This post will walk you through the process of adopting the UXG Max Gateway into your network. Follow these steps carefully to ensure a smooth setup.
1. Unboxing and Initial Inspection
- Carefully unpack the UXG Max Gateway.
- Check for any physical damage.
- Verify that all accessories (power adapter, Ethernet cable, etc.) are included.
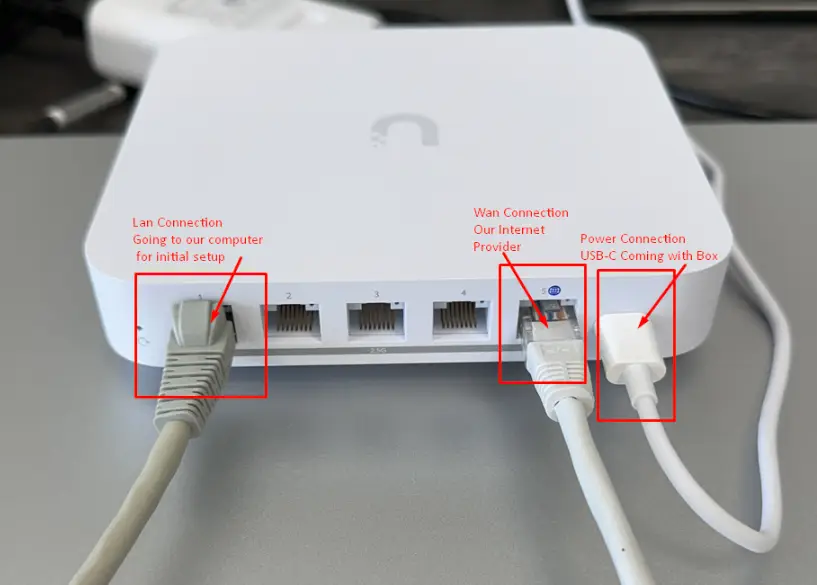
2. Physical Connection
- Connect the WAN port of the UXG Max to your internet service provider’s modem or existing network.
- Connect a computer or switch to one of the LAN ports.
- Plug in the power adapter and turn on the UXG Max.
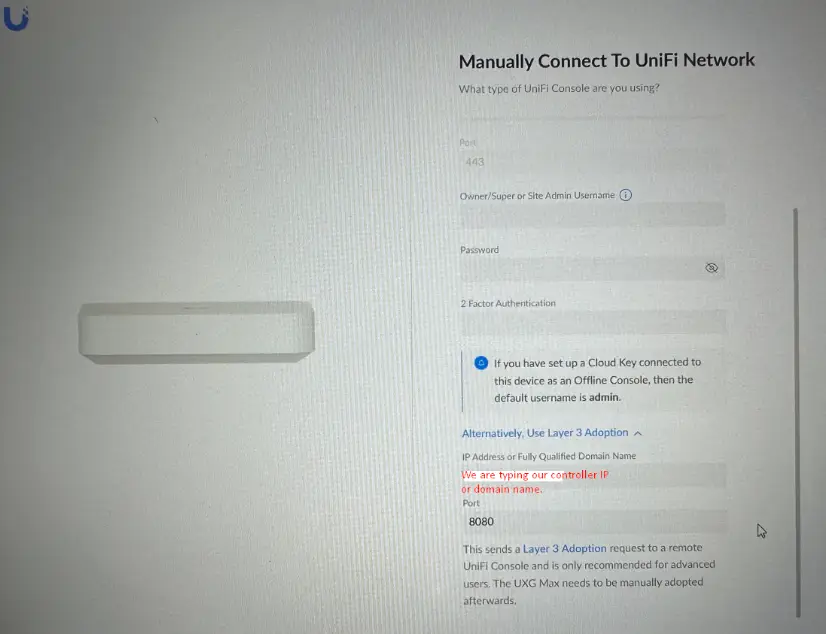
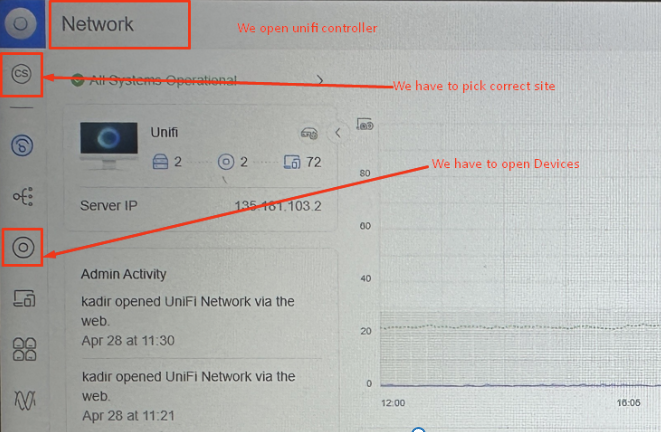
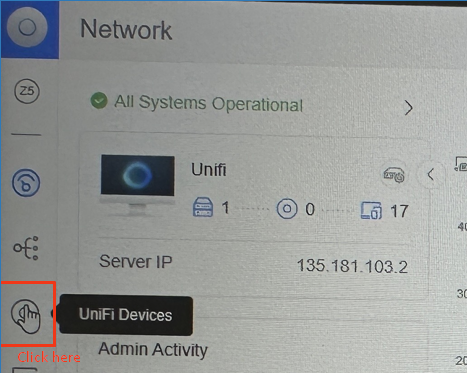
3. Accessing the UniFi Network Controller
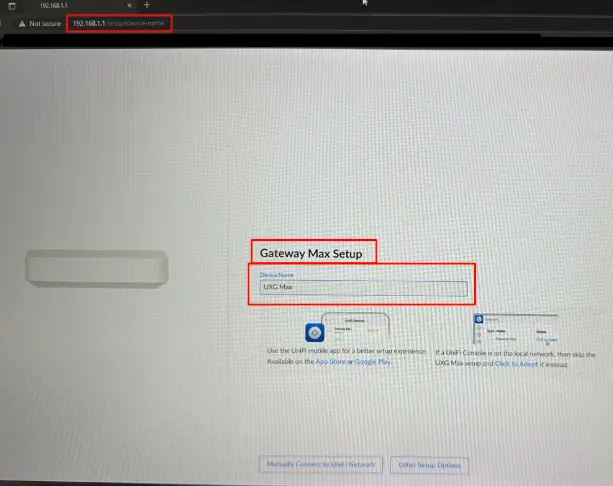
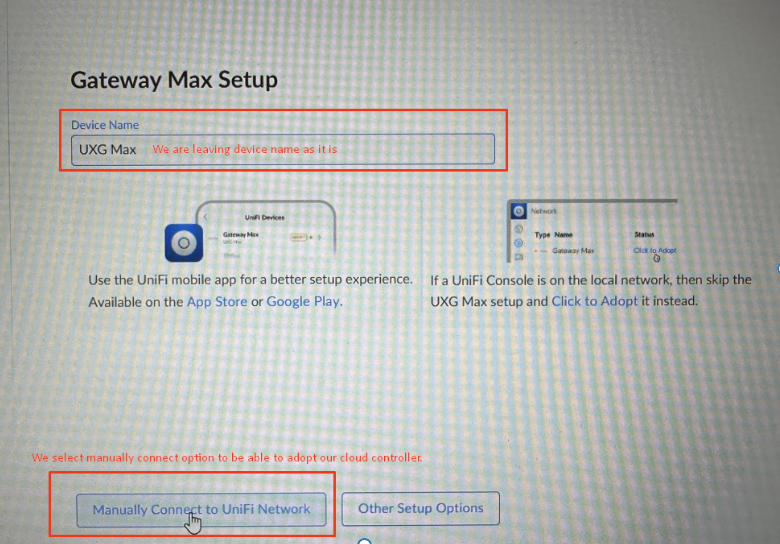
- Ensure your computer is connected directly to the UXG Max.
- Open a web browser and navigate to the IP address 192.168.1.1. The UXG Max default IP address is 192.168.1.1.
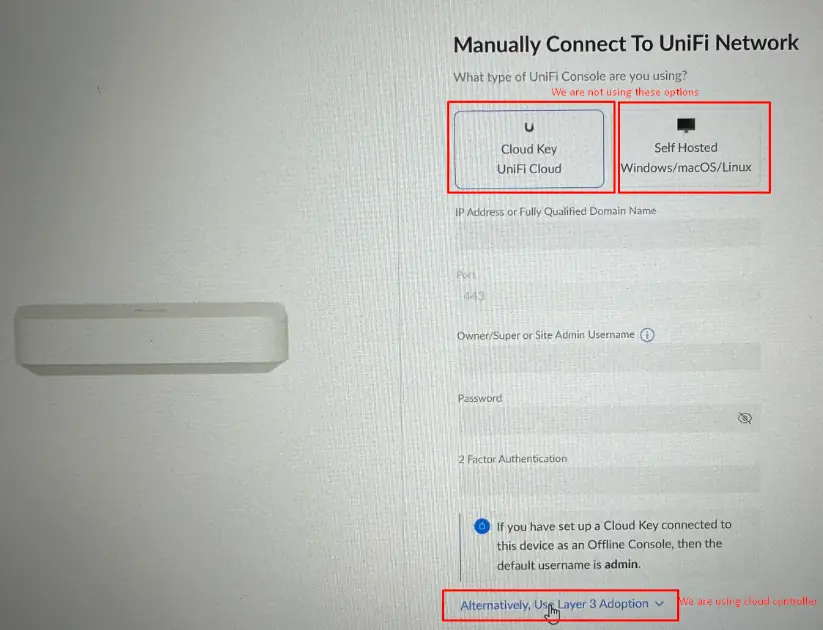
- If you don’t have a UniFi Network Controller, you will need to set one up. You can download and install it on your computer, or use a UniFi Cloud Key, or you have to have a cloud controller.
- We are using our cloud controller for this guide. You could follow the steps below.
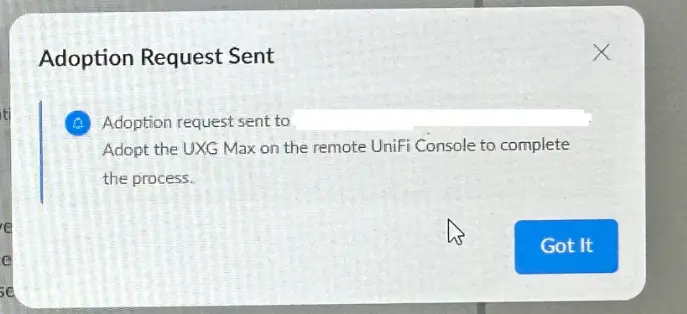
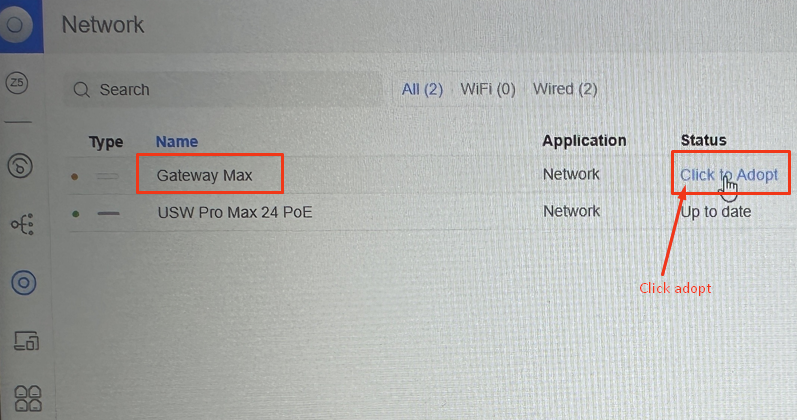
4. Adopting the UXG Max
- Once in the UniFi Network Controller, you will see the UXG Max listed as “Pending Adoption.”
- Click “Adopt” and follow the on-screen instructions.
- The UXG Max will go through the adoption process, which may take several minutes.
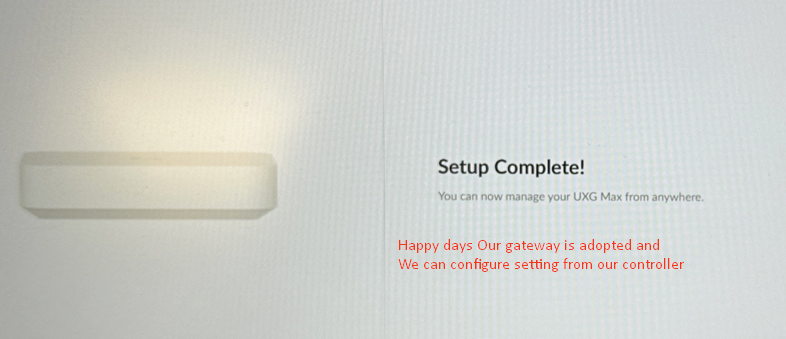
5. Configuration
- After adoption, access the UXG Max settings through the UniFi Network Controller.
- Configure your network settings, such as IP address range, DHCP server, and firewall rules.
- Update the firmware to the latest version.
6. Verification
- Test your internet connection.
- Ensure all devices on your network can connect to the internet.
- Monitor the network performance and make adjustments as needed.
Troubleshooting Tips
- If the UXG Max does not appear for adoption, check the physical connections and ensure it is powered on.
- If you cannot access the UniFi Network Controller, verify your computer’s IP address and network settings.
- Refer to the official UniFi documentation for more detailed troubleshooting steps.
| Step | Action | Notes |
|---|---|---|
| 1 | Unboxing | Check for damages |
| 2 | Physical Connection | Connect the WAN and the LAN |
| 3 | Access Controller | Navigate to the IP address |
| 4 | Adoption | Click “Adopt” |
| 5 | Configuration | Set up IP, DHCP, and firewall |
| 6 | Verification | Test the internet connection |