Many small and medium-sized business owners assume cyberattacks are something that only happens to large corporations. But that’s a dangerous myth. In truth, SMEs are seen as easier targets—fewer security measures, smaller IT teams, and limited budgets all make them appealing to cybercriminals.

Think of it this way: if a burglar knows one house has an alarm system and cameras while the other leaves the back door unlocked, which one do you think they’ll go for?

And when a breach does happen, the fallout for SMEs can be catastrophic. It’s not just about financial loss—there’s reputational damage, legal risk, and operational chaos. Having a data breach response plan isn’t just a best practice. It’s a lifeline.


Spotting the Signs Early

Some breaches hit like a sledgehammer—you’ll see ransom notes, system shutdowns, or public data leaks. Others are far more subtle, quietly worming their way through your systems for days, even weeks, before you notice.

Common warning signs include:

  • Unusual login activity, especially outside business hours
  • Sluggish system performance without a clear cause
  • Files being changed or moved without explanation
  • Security tools flagging unauthorised access attempts

Your first line of defence is a well-trained team. Employees who know what to watch for can report suspicious activity before things spiral.


Step-by-Step Guide: What to Do When It Happens

Step 1: Detect and Identify

First, confirm that a breach has actually occurred. That means checking logs, monitoring alerts, and investigating any red flags raised by your staff or systems.

Ask yourself:

  • What systems are impacted?
  • When did the issue first arise?
  • What type of data might be compromised?

Get a clear picture. Document every detail. You’ll need this later for both legal compliance and internal review.


Step 2: Contain the Breach

Once confirmed, your focus shifts to limiting the damage. This is your digital damage control.

Immediate actions may include:

  • Disconnecting infected machines from the network
  • Disabling user accounts showing suspicious activity
  • Blocking malicious IP addresses
  • Forcing password resets for affected users

Be careful not to delete anything just yet. Preserving evidence is vital for investigation and compliance.


Step 3: Assess the Damage

Next, you need to dig into the “what” and “how much.” Collaborate with your internal IT team or Managed Service Provider (MSP) to audit the breach.

Areas to check:

  • Personal data (customers or staff)
  • Financial information
  • Login credentials
  • Internal business documents or communications

Again, document everything. This not only helps with the remediation but ensures you’re ready if regulators come knocking.


Step 4: Notify Affected Parties

If personal or sensitive data has been compromised, transparency is essential. Depending on the nature of the breach, you may be legally required to inform customers and other third parties.

A good breach notification should include:

  • What happened
  • What data was involved
  • What actions you’re taking
  • What they can do (e.g. password reset, fraud monitoring)

In Ireland, the Data Protection Commission (DPC) must be notified of any notifiable breach within 72 hours. Miss that window and you could be hit with steep fines.


Step 5: Report to the Authorities

On top of your DPC notification, criminal breaches (such as ransomware or theft) should be reported to An Garda Síochána. This step shows due diligence and helps national efforts to track cybercrime trends.

Keep a record of all communications—it’s a key part of demonstrating compliance under GDPR.


Step 6: Remediate and Recover

Once the immediate threat is under control, it’s time to patch things up. That doesn’t mean slapping on a sticking plaster and hoping for the best.

Recovery might include:

  • Restoring systems from secure, clean backups
  • Updating software and applying security patches
  • Reviewing and tightening firewall and access settings
  • Rolling out refresher training for staff
  • Reviewing third-party integrations and limiting exposure

If you’re working with a Managed Service Provider, they’ll help with both the tech and the admin burden of recovery.


Step 7: Review, Learn, and Improve

Now’s the time to hold a proper post-incident review. This isn’t about pointing fingers—it’s about learning and getting stronger.

Your review should examine:

  • The full timeline of the breach
  • Key decisions and actions taken
  • Communication gaps or delays
  • Weak points in your existing security or response plan

Update your data breach response plan based on the lessons learned, and—crucially—test the updated plan. If it just sits in a folder, you’re no better off than before.


Incident Response Checklist for SMEs

Here’s a simple, printable checklist you can keep handy:

  • Confirm the breach
  • Contain the affected systems
  • Notify internal stakeholders
  • Assess what data or systems were affected
  • Notify affected individuals (and DPC if required)
  • Report to Gardaí if criminal activity is suspected
  • Remediate systems and update security
  • Document every step taken
  • Conduct a post-incident review
  • Update your response plan and train staff

Print it. Stick it on the wall. Make sure your team knows where to find it when it matters.


Free Data Breach Response Plan Template

To save you time (and stress), we’ve created a free downloadable response plan template tailored for SMEs. It includes:

  • Defined roles and responsibilities
  • Key contact lists
  • Communication templates
  • Step-by-step breach action items
  • Notification timelines to stay GDPR compliant

You can customise it for your industry and business size, making it a ready-to-go tool in your cybersecurity toolkit.


How CK Computer Solutions Can Help

Creating and managing a solid data breach response plan might seem like a big ask—especially if you don’t have a full-time IT department. That’s where we come in.

At CK Computer Solutions – Managed IT Services Dublin, we partner with small and medium-sized businesses across Ireland to strengthen cybersecurity and prepare for the unexpected.

Here’s how we can help:

  • Develop and test a bespoke breach response plan for your business
  • Monitor your systems 24/7 for suspicious activity
  • Respond instantly when something goes wrong—no waiting, no delays
  • Provide secure, encrypted backups and rapid disaster recovery
  • Deliver ongoing staff training to reduce human error
  • Keep you GDPR-compliant with breach reporting support and documentation

We’re not just your IT provider—we’re your safety net. When a breach hits, you’ll be glad you’ve got CK in your corner.

Need help building your plan or recovering from a breach? Let’s chat.


This post will walk you through the process of adopting the UXG Max Gateway into your network. Follow these steps carefully to ensure a smooth setup.

1. Unboxing and Initial Inspection

  • Carefully unpack the UXG Max Gateway.
  • Check for any physical damage.
  • Verify that all accessories (power adapter, Ethernet cable, etc.) are included.

2. Physical Connection

  • Connect the WAN port of the UXG Max to your internet service provider’s modem or existing network.
  • Connect a computer or switch to one of the LAN ports.
  • Plug in the power adapter and turn on the UXG Max.

3. Accessing the UniFi Network Controller

  • Ensure your computer is connected directly to the UXG Max.
  • Open a web browser and navigate to the IP address 192.168.1.1. The UXG Max default IP address is 192.168.1.1.
  • If you don’t have a UniFi Network Controller, you will need to set one up. You can download and install it on your computer, or use a UniFi Cloud Key, or you have to have a cloud controller.
  • We are using our cloud controller for this guide. You could follow the steps below.  

4. Adopting the UXG Max

  • Once in the UniFi Network Controller, you will see the UXG Max listed as “Pending Adoption.”
  • Click “Adopt” and follow the on-screen instructions.
  • The UXG Max will go through the adoption process, which may take several minutes.

5. Configuration

  • After adoption, access the UXG Max settings through the UniFi Network Controller.
  • Configure your network settings, such as IP address range, DHCP server, and firewall rules.
  • Update the firmware to the latest version.

6. Verification

  • Test your internet connection.
  • Ensure all devices on your network can connect to the internet.
  • Monitor the network performance and make adjustments as needed.

Troubleshooting Tips

  • If the UXG Max does not appear for adoption, check the physical connections and ensure it is powered on.
  • If you cannot access the UniFi Network Controller, verify your computer’s IP address and network settings.
  • Refer to the official UniFi documentation for more detailed troubleshooting steps.
StepActionNotes
1UnboxingCheck for damages
2Physical ConnectionConnect the WAN and the LAN
3Access ControllerNavigate to the IP address
4AdoptionClick “Adopt”
5ConfigurationSet up IP, DHCP, and firewall
6VerificationTest the internet connection


For any small or medium-sized enterprise (SME), your Wi-Fi network is the backbone of your business operations. However, if not properly secured, your network can also be your Achilles’ heel, leaving you vulnerable to cyber threats, data breaches, and unauthorised access. Ensuring robust Wi-Fi security should be a priority for every business owner. Here’s how to keep your network safe and secure.

Why SMEs Should Hide Their Wi-Fi SSID

Your Wi-Fi network’s Service Set Identifier (SSID)—the network name visible to anyone scanning for available networks—is the first thing potential intruders see. By hiding your SSID, you significantly reduce the visibility of your network to outsiders.

Although experienced hackers can still detect hidden networks, it adds an extra layer of security that deters casual snoopers. By implementing hidden SSIDs, SMEs can minimise the risk of opportunistic cyber-attacks, keeping sensitive business information safer.

WPA3 Encryption: Your Network’s Best Defence

Encryption is your network’s frontline defence against unauthorised access. WPA3, the latest and strongest Wi-Fi security protocol available, offers robust protection by addressing the vulnerabilities present in its predecessor, WPA2.

WPA3 encryption provides enhanced cryptographic strength, tougher password protections, and better resistance to brute-force attacks, making it essential for SMEs serious about protecting their business data.

Smart Trick: Create a Separate Guest Network

One simple yet highly effective way to boost your Wi-Fi security is by setting up a separate guest network. This practice isolates visitor and customer access from your main business network, significantly reducing potential threats.

A dedicated guest network ensures visitors have internet access without granting them access to your sensitive company data, internal resources, or equipment. This isolation prevents malware or threats introduced by guest devices from impacting your primary network, adding a valuable extra layer of security.

Isolating Networks with VLANs

For businesses with more complex needs or multiple departments, implementing VLANs (Virtual Local Area Networks) is a powerful way to isolate traffic within your network. VLANs allow you to segment your network into different zones—for example, separating accounting systems from general employee devices or isolating IoT devices from core business infrastructure.

This network segmentation limits access between zones, so even if one part of the network is compromised, it won’t affect the rest. VLANs are especially useful for managing bandwidth, enhancing performance, and enforcing tighter access controls.

Setting up VLANs typically requires compatible networking equipment and some configuration, but the security benefits are well worth the effort. It’s a smart, scalable solution for SMEs that want to future-proof their IT infrastructure.

Quick Guide to Checking Your Router Security Settings

Regularly checking and updating your router’s security settings is essential for maintaining robust network security. Here’s a quick guide to help you ensure your settings are optimised:

  1. Access Router Settings:
    • Open a web browser and enter your router’s IP address (usually printed on the router itself).
    • Log in using your admin username and password.
  2. Check Security Protocol:
    • Navigate to the wireless settings page.
    • Verify that WPA3 is selected. If not available, ensure WPA2 with AES encryption is enabled as a minimum.
  3. Change Default Credentials:
    • Always update the default router username and password. Choose a strong, unique password.
  4. Hide Your SSID:
    • Look for the option “Hide SSID” or “Disable Broadcast” in the wireless settings.
  5. Create a Guest Network:
    • Enable the guest network option in your router’s settings.
    • Ensure it uses a unique password and appropriate security settings.
  6. Enable VLAN Support (if available):
    • Check if your router or managed switch supports VLAN configuration.
    • Create VLANs for different departments or device types.
    • Assign ports and set access rules to enforce segmentation.

How CK Computer Solutions Can Enhance Your Wi-Fi Security

At CK Computer Solutions – Managed IT Services Dublin, we specialise in securing your IT infrastructure so you can focus on your core business. Our experienced team can:

  • Evaluate your current network security.
  • Assist with upgrading to WPA3 encryption.
  • Configure hidden SSIDs for added security.
  • Set up isolated guest networks.
  • Design and deploy VLANs for network segmentation.
  • Continuously monitor and manage your network to safeguard against emerging threats.

Partnering with CK Computer Solutions ensures your Wi-Fi network remains secure, reliable, and resilient, giving you peace of mind to confidently run your business.


What Is SSO?

SSO, or Single Sign-On, is a user authentication process that allows individuals to access multiple applications or systems with just one set of login credentials.

Think of it like having a master key to all your digital doors — email, CRM, HR systems, cloud storage, and so on. Instead of remembering dozens of passwords, a user logs in once, and that session grants access to all integrated platforms.

For businesses juggling a mix of cloud-based tools, internal systems, and remote teams, SSO is more than just a convenience — it’s a smart move.


How SSO Works

SSO is made possible through a central authentication server. When a user logs in, the system checks their identity via this server. Once confirmed, a token (a digital stamp of approval) is issued and passed around to each service the user wants to access.

Popular protocols that support this include:

  • SAML (Security Assertion Markup Language)
  • OAuth
  • OpenID Connect

These protocols ensure that the user’s identity can be verified safely across different services, without requiring multiple logins.


Key Benefits of SSO for Businesses

1. Improved Security

Contrary to the old idea that more passwords mean better security, SSO actually reduces security risks.

  • Users only need to remember one strong password, reducing the temptation to reuse weak ones across platforms.
  • SSO can be paired with Multi-Factor Authentication (MFA), adding an extra layer of protection.
  • It also centralises access control — if a user leaves the company, disabling one account cuts off access to everything. No more forgotten logins lying around on old systems.

2. Boosted Productivity

How much time do your staff waste entering passwords or trying to reset forgotten ones? It adds up. With SSO:

  • Login times are slashed.
  • Users can jump straight into work without hurdles.
  • Admins aren’t constantly firefighting password issues.

It’s a productivity win across the board, especially for businesses that rely on several digital tools daily.

3. Better User Experience

We’re all users at the end of the day, and there’s nothing more frustrating than being locked out of a platform because you forgot a password — again.

SSO creates a smoother, faster experience for:

  • Employees
  • Remote contractors
  • Temporary users
  • Clients accessing portals

This ease-of-use is particularly crucial in customer-facing systems, where delays can directly impact satisfaction and reputation.

4. Easier Compliance

Data protection laws like GDPR, HIPAA, and others require organisations to tightly control access to personal data.

SSO simplifies this by:

  • Making it easier to track and audit user activity across platforms.
  • Centralising access policies and credentials.
  • Enabling role-based access control, ensuring staff only access what they need.

Being audit-ready is a lot easier when everything runs through a unified access system.

5. Reduced IT Helpdesk Burden

Ask any IT team what eats up their time and you’ll likely hear: password resets. In fact, studies show that up to 50% of helpdesk calls are password-related.

With SSO:

  • There’s only one password to manage.
  • Support calls drop.
  • Your IT team can focus on more strategic tasks.

It also lowers the risk of human error — such as accidentally resetting the wrong account or missing critical updates across multiple platforms.


Challenges Without SSO

Many SMEs still run without SSO, often because they assume it’s only for large enterprises. But the challenges speak for themselves:

  • Password fatigue leads to reused credentials and weak security.
  • Onboarding and offboarding are clunky, time-consuming, and risky.
  • Compliance checks become a nightmare when access isn’t centrally logged.
  • User frustration rises, hurting productivity and morale.

Every additional system with a separate login is another potential security gap.


Why Your Business Should Consider It Now

The shift to hybrid work and cloud platforms has expanded the number of apps businesses rely on. If you’re using tools like Microsoft 365, Salesforce, Dropbox, Xero, or even industry-specific systems, SSO can tie them all together under a single access policy.

The longer you delay, the more unwieldy and risky your access management becomes.

And importantly — SSO is no longer the exclusive domain of large corporations. Solutions like Azure AD, Okta, and Google Workspace Identity now offer SSO features tailored to SMEs.


How CK Computer Solutions Can Help

At CK Computer Solutions – Managed IT Services Dublin, we help businesses like yours roll out practical, secure, and cost-effective tech solutions — and SSO is a game-changer.

We can:

  • Assess your current systems and recommend SSO-compatible integrations.
  • Implement and configure SSO platforms like Azure Active Directory or Okta.
  • Set up MFA to strengthen security alongside SSO.
  • Train your team on how to use the new system effectively.
  • Provide ongoing support and monitoring so your access remains secure and seamless.

Whether you’re a growing business tired of password chaos or an established firm looking to tighten your security posture, we’ll make sure your SSO rollout is smooth and hassle-free.

Ready to take the next step in simplifying and securing your business IT? Talk to CK Computer Solutions today – your local IT experts here in Dublin, always ready to help you work smarter.


Here are the PPPoE (Point-to-Point Protocol over Ethernet) settings typically used for Vodafone Ireland and Eir (formerly Eircom) fibre broadband connections. These details are needed if you’re setting up your own router instead of using the one provided by your ISP.

Vodafone Ireland – Fibre Broadband PPPoE Settings

  • Username: vodafone@vodafone.ie
  • Password: vodafone
  • Encapsulation: PPPoE
  • VLAN ID: 10
  • Connection Type: Routed PPPoE
  • MTU: 1492 (standard for PPPoE)
  • DNS: Can be set to automatic, or use public DNS like Google (8.8.8.8 / 8.8.4.4)

Note: For Gigabit fibre (FTTH), VLAN tagging is essential and must be enabled on your router.


Eir (Eircom) – Fibre Broadband PPPoE Settings

  • Username: eircom@eircom.net (may vary depending on legacy or new accounts)
  • Password: eircom
  • Encapsulation: PPPoE
  • VLAN ID: 10
  • Connection Type: Routed PPPoE
  • MTU: 1492
  • DNS: Use automatic, or set to Google (8.8.8.8) or Cloudflare (1.1.1.1)

Again, VLAN ID tagging is required for most fibre setups.

Sky Ireland uses MER (MAC Encapsulated Routing) for their standard routers, but you can use PPPoE with third-party setups under certain conditions.

  • Username: Typically not required or varies per account – you may need to contact support
  • Password: Typically not required
  • VLAN ID: 10
  • MTU: 1500 (or 1492 for PPPoE fallback)

Important: Sky often requires DHCP Option 61 (client identifier string) to authenticate. This isn’t supported natively by UniFi devices at this time without workaround firmware or bridging the Sky router.

If you’re using Sky Broadband, especially over FTTH, it’s worth noting that:

  • Sky typically authenticates using DHCP Option 61 (MER), not PPPoE.
  • UniFi routers do not support DHCP Option 61 by default.
  • For Sky, most users will need to:
    • Use the Sky router in bridge mode
    • Or keep the Sky router as the gateway, and place the UniFi device behind it in a double-NAT setup (not ideal)
    • Or use a different router that supports Option 61 to act as a bridge

If you’re on Sky and want a clean UniFi setup, get in touch with us first to assess your options — we’ve worked around this for a few of our business clients.


Helpful Notes

  • If you’re using a third-party router (like a TP-Link, Ubiquiti, ASUS or MikroTik, Unifi ), make sure:
    • VLAN Tagging is turned on and set to ID 10.
    • You enter the PPPoE username and password exactly as shown.
    • You disable the modem/router provided by Vodafone or Eir to avoid double NAT issues.
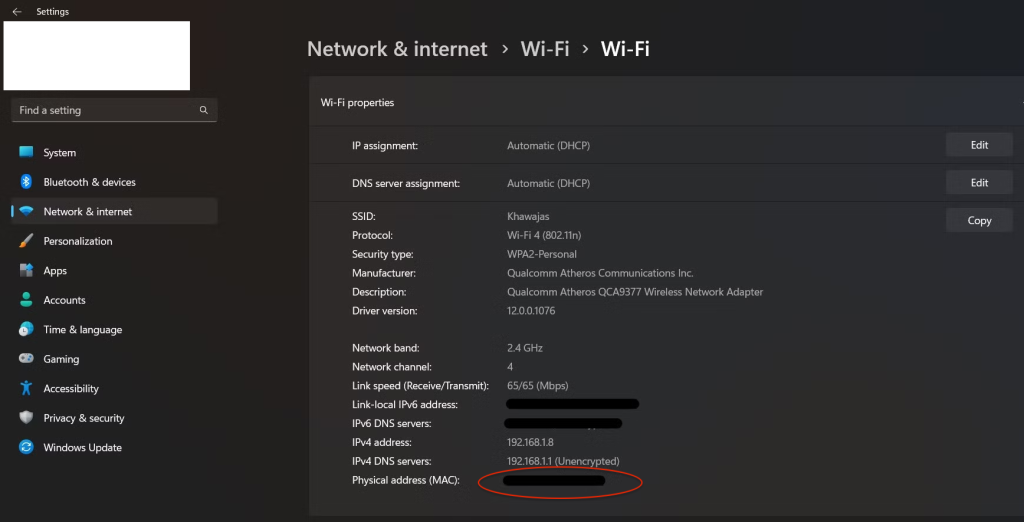
  • Some ISPs may lock services to the MAC address of their own modem, especially on FTTH. If you have issues connecting, try cloning the MAC address of the original device into your new router.

Need Help Setting This Up?

At CK Computer Solutions – Managed IT Services Dublin, we regularly configure third-party routers and business-grade firewalls for both home and small business fibre broadband connections across Ireland.

Whether you’re upgrading your home setup for better Wi-Fi, or connecting a multi-site network for your business, CK can:

  • Configure your PPPoE connection correctly.
  • Install and manage advanced routers and firewalls.
  • Optimise VLAN and QoS for VoIP, CCTV, and smart devices.
  • Offer ongoing managed IT support and remote monitoring.

Let us take the headache out of broadband setup – we’ll make sure it’s fast, secure, and tailored to your needs. Get in touch with us today for a smoother connection and proper IT peace of mind.


Microsoft 365 Grants Are Changing – What Irish Nonprofits Need to Know

There’s a major shake-up on the way for charities and nonprofit organisations that rely on Microsoft 365. From 1st July 2025, Microsoft will end the free grant licences for both Microsoft 365 Business Premium and Office 365 E1. If your organisation is using these products, it’s time to reassess your setup and plan ahead.

Ignoring these changes could leave you scrambling at renewal time — or worse, facing downtime or data loss. But with the right strategy, you can transition smoothly and continue to benefit from Microsoft’s cloud tools.


What Exactly Is Changing?

For years, Microsoft has supported the nonprofit sector with free access to powerful business tools through their Tech for Social Impact programme. These included:

  • Microsoft 365 Business Premium
  • Office 365 E1

However, from 1st July 2025, these grant-based (free) licences will be phased out at renewal. If your renewal date falls on or after this date, the free versions of these products will no longer be available.

Instead, Microsoft is offering new options to ensure nonprofits can still access the tools they need:

  • Up to 300 Microsoft 365 Business Basic licences – completely free
  • Discounts of up to 75% on Business Premium, Office 365 E1, and other plans

What’s in Microsoft 365 Business Basic?

This is now the main free offering for eligible nonprofits. It includes:

✅ Web and mobile versions of Word, Excel, PowerPoint
✅ Microsoft Teams (online collaboration and meetings)
✅ Exchange Online (email hosting)
✅ OneDrive (1TB cloud storage per user)
✅ SharePoint (document management and intranet features)

However, it does not include:

❌ Desktop Office apps (like Word or Excel installed on PCs)
❌ Advanced security and threat protection
❌ Device management and compliance tools

If your team is comfortable working via browser and mobile apps, Business Basic may cover most of your needs.


What If You Need More?

Some nonprofits depend on desktop Office apps, enhanced security, or mobile device management. In that case, you’ll want to explore the discounted versions of:

  • Microsoft 365 Business Premium
  • Office 365 E1
  • Enterprise licences

Microsoft is offering up to 75% off for these products — a significant saving, especially for midsize or larger nonprofits with multiple users and more complex IT requirements.


What Should You Do Now?

It’s important not to leave this until the last minute. Here’s a practical roadmap:

1. Audit Your Current Licences

Look at your Microsoft 365 Admin Centre. Identify:

  • How many users you have
  • What type of licences they’re using
  • What features are essential (desktop apps, advanced security, compliance, etc.)

2. Segment Users Based on Needs

Not every staff member or volunteer needs the full suite. You could mix and match plans:

  • Use Business Basic for users who just need Teams and email
  • Use Business Premium for those managing sensitive data or devices

3. Reassign Licences

Start shifting users from the soon-to-expire grant licences to Business Basic or discounted paid plans. Microsoft provides migration tools and licence reassignment guides to help.

4. Budget for Paid Features

While some licences will still be free, others will incur a cost. Start factoring this into your budget now, so you’re not caught off guard next summer.

5. Ensure Data Safety During Transition

Make sure emails, OneDrive files, and SharePoint sites are fully backed up. Licence transitions shouldn’t delete your data — but don’t take any chances.


What If You’re Not Sure Where to Begin?

Transitioning Microsoft 365 licences might sound straightforward, but there are always curveballs — compatibility issues, data retention rules, or users accidentally locked out of email. That’s where a bit of expert help goes a long way.

At CK Computer Solutions – Managed IT Services Dublin, we work closely with Irish nonprofits to ensure they get the most out of Microsoft technologies — securely, affordably, and with minimal disruption. Here’s how we can support you:

  • Licence audits: We’ll help you map out who needs what — and avoid paying for tools you’re not using.
  • Smooth transitions: Whether you’re moving from E1 to Business Basic or need a hybrid setup, we’ll manage it all.
  • Data protection: We make sure no critical data is lost during migration, with secure backups and Microsoft 365 best practices.
  • Ongoing support: Questions come up. We stay with you long after the switchover to keep your systems running smoothly.

Whether you’re a charity, social enterprise, or voluntary group, CK Computer Solutions is ready to guide your nonprofit through this Microsoft licensing shift — and set you up for long-term success.


📅 Don’t wait — July 2025 may seem far away, but planning now could save you stress (and money) down the line. Reach out to CK Computer Solutions today for expert guidance on navigating these changes with confidence.

Email to users:

Your Microsoft 365 Business Premium grant is being discontinued

Your Microsoft 365 Business Premium grant will expire on April 25, 2026.

The Microsoft 365 Business Premium grant will be discontinued on your next renewal on or after July 1, 2025. Your licenses will expire on April 25, 2026. We will continue to provide up to 300 granted licenses of Microsoft 365 Business Basic and discounts of up to 75 percent on many Microsoft 365 offers to nonprofits, including Microsoft 365 Business Premium.

We strongly advise transitioning your users to a different Microsoft 365 offer for nonprofits before the subscription is canceled to avoid disruption and data loss. Learn more about what happens to your data and access when your subscription ends.

More information

To ensure a smooth transition and avoid any impact on your data and users, we recommend transitioning your users from the legacy Microsoft 365 Business Premium grant to the Microsoft 365 Business Basic grant or another Microsoft 365 offer for nonprofits. To transition users, you will need to manually complete the following steps within the Microsoft 365 admin center:

1.     Select the Microsoft 365 Business Basic grant or another Microsoft 365 offer for nonprofits through the Microsoft 365 admin center,

2.     Confirm the licenses are present in your tenant,

3.     Replace the licenses, by selecting all of your users with a Microsoft 365 Business Premium license and choose to replace these users’ licenses with Business Basic or another Microsoft 365 offer for nonprofits, and

4.     Select your Microsoft 365 Business Premium subscription and choose to cancel the subscription.

More guidance about how to manually change Microsoft licenses can be found in this support article: Change Microsoft 365 for business plans manually | Microsoft Learn.


For companies using Google Workspace for email and scheduling, and Microsoft Teams for meetings and collaboration, it can sometimes feel like switching between two worlds. Thankfully, there’s a simple way to bring these platforms together by integrating Microsoft Teams directly into your Google Calendar.

Here’s how to do it—and why it matters.


Why Integrate Microsoft Teams with Google Calendar?

Integrating Microsoft Teams with Google Workspace Calendar makes scheduling and joining meetings far more seamless. Whether you’re a business owner, admin, or team member, this setup offers several advantages:

  • Streamlined Scheduling: Create Microsoft Teams meetings right from Google Calendar without switching apps.
  • Simplified Collaboration: Easily invite colleagues and clients who use different systems.
  • Unified Workflow: Manage events and video calls all in one familiar interface.

This is especially useful for organisations that use Google Workspace for productivity but rely on Teams for external meetings or cross-department collaboration.


Step-by-Step: Installing the Microsoft Teams Add-On in Google Calendar

To get started, you’ll need a Microsoft 365 work or school account. Here’s how to integrate Teams into Google Calendar:

1. Open Google Calendar

Use a web browser and sign in to your Google Workspace account.

2. Access the Side Panel

On the right-hand side, click the ‘+’ (Get Add-ons) icon. If the panel is hidden, select “Show side panel” at the bottom of your screen.

3. Search for the Add-On

In the Google Workspace Marketplace, search for “Microsoft Teams Meeting”.

4. Install the Add-On

Click on the Microsoft Teams Meeting app and select “Install”. Follow the steps to grant the required permissions.

5. Sign In

After installation, the Teams icon will appear in the side panel. Click it and sign in with your Microsoft work or school account.

💡 Note: If you’re a Google Workspace admin and wish to install this across your organisation, make sure to enable data access in the Admin Console under Apps > Google Workspace Marketplace apps > Microsoft Teams Meeting > Data Access.


How to Schedule a Teams Meeting from Google Calendar

Once the add-on is installed, creating a meeting is simple:

  1. Click “Create” in Google Calendar.
  2. Select “More options” at the bottom of the event pop-up.
  3. Click on “Add conferencing” and choose “Microsoft Teams meeting”.
  4. Add your guests, title, time, and any additional notes.
  5. Click “Save”—your invite will now include a Teams meeting link.

Guests will receive the calendar invite with a link to join the meeting via Microsoft Teams, even if they don’t use Teams regularly.


Troubleshooting Common Issues

If you experience issues, such as an “Authorise Access” prompt:


Integrating Microsoft Teams with your Google Calendar is a small change that can make a big impact on productivity and communication. Especially for Irish businesses using a hybrid approach to technology, this integration brings the best of both platforms together.

You can install the Microsoft Teams Meeting add-on directly from the Google Workspace Marketplace today and start scheduling smarter.


Invoice redirection scams are one of the most financially damaging fraud tactics affecting Irish businesses today — particularly small and medium-sized enterprises (SMEs) that often lack robust payment verification procedures. These scams are clever, subtle, and can catch even the most diligent finance team off guard.

In this post, we’ll break down how invoice redirection scams typically work, and more importantly, outline clear procedures your business can follow when a supplier asks to change their bank details.


What Is an Invoice Redirection Scam?

An invoice redirection scam, sometimes called mandate fraud, occurs when a criminal tricks a business into changing the bank account details of a genuine supplier — redirecting payments to a fraudulent account controlled by the scammer.

Here’s how it usually works:

  1. The Set-Up: The scammer monitors your communications, often through email account compromise or social engineering, to identify payment patterns and key suppliers.
  2. The Deception: They pose as a legitimate supplier and send an email requesting a change in bank account details — often using a lookalike email address or even compromising the real supplier’s email account.
  3. The Pay-Out: Your accounts team updates the supplier’s details and processes the next invoice payment — but the funds go directly to the fraudster’s account.

By the time the real supplier starts asking why they haven’t been paid, the money is long gone.


Why This Scam Works So Well

What makes this scam particularly dangerous is that it doesn’t rely on malware or brute-force attacks. It uses trust, timing, and a dash of social engineering.

Scammers often study their victims carefully, learning supplier names, invoice due dates, and internal approval chains. The fake emails they send often look just like the real thing — complete with signatures, logos, and familiar language.

Unless your team is trained to spot red flags and follows strict verification procedures, these scams are frighteningly easy to fall for.


Tips for Verifying Supplier Bank Detail Changes

To protect your business from invoice redirection scams, follow these practical steps every time a supplier requests a bank account change:

1. Always Call to Confirm – Using Trusted Details

Never rely on the contact details included in an email requesting bank changes. Always use the contact number you’ve previously saved for the supplier — or look it up on their official website. Speak to someone you know and trust in their accounts department.

It might feel like an extra step, but a 2-minute phone call could save your business tens of thousands of euro.

2. Verify in Writing – But Not by Email Alone

After a verbal confirmation, request a written confirmation of the change. This adds a second layer of verification and ensures there’s a documented trail of the request. However, don’t rely on email alone for verification — especially if that’s how the initial request came in.

3. Use a Supplier Change Request Form

Implement a standardised form in your company that must be completed for any supplier banking changes. This form should include:

  • Supplier name and contact
  • Previous bank details
  • New bank details
  • Date of request
  • Name of internal staff member processing the change
  • Signature of authorised approver

Make it company policy that no change is processed without this form completed and signed off.


IT Procedures to Support Fraud Prevention

While people are the first line of defence, your IT systems play a huge role in preventing and detecting fraud attempts.

At CK Computer Solutions, we help businesses across Dublin and beyond implement secure email systems, employee training, and fraud monitoring tools. Here’s how we can help:

  • Email Filtering & Monitoring: We’ll help ensure phishing emails and spoofed domains are blocked before they ever hit your inbox.
  • Multi-Factor Authentication (MFA): Adding MFA to your email systems makes it much harder for criminals to compromise staff accounts.
  • Audit Trails & Access Controls: We’ll help you implement IT controls to track who’s accessing sensitive supplier and finance data — and when.
  • Cybersecurity Awareness Training: We’ll train your staff to spot suspicious emails, verify requests, and follow secure processes confidently.

We’re not just here to install software — we’re your trusted managed IT services provider. We’ll work closely with your finance and procurement teams to integrate technology with policy and process.


Red Flags to Watch Out For

Train your team to stay alert for the following warning signs:

  • Urgent or last-minute requests to change payment details.
  • Poor grammar or formatting in emails, especially from regular contacts.
  • Slight variations in email addresses (e.g. suppliername@companny.com instead of company.com).
  • Emails that skip personal greetings or use vague language.
  • Requests that pressure staff to “just process this quickly.”

If something feels off — trust your gut and verify independently.

Invoice redirection scams can be devastating — but they’re also preventable with the right mix of process, technology, and awareness.

Take the time to build and enforce procedures around supplier bank changes. Train your staff regularly. And make sure your IT systems are properly set up to detect and block threats before they cause damage.

At CK Computer Solutions – Managed IT Services Dublin, we can help you review and strengthen your internal controls, protect your email systems, and provide ongoing training for your team. Whether you’re a small local business or a growing SME, we’re here to help you stay safe, smart, and secure.


Need help locking down your systems or training your team against invoice scams?
Get in touch with CK Computer Solutions today – and let’s build a safer digital foundation for your business.


Ubiquiti’s UniFi Controller software has long been a favourite for managing networks with precision, control, and a clean interface. With the launch of UniFi Controller 9.0, Ubiquiti has doubled down on stability, user experience, and added more polish across the board. But what’s actually changed in this latest version, and is it worth upgrading?


Clean Interface, Smarter Navigation

First things first – the UI refresh. While UniFi has always had a slick interface, version 9.0 brings subtle but important design tweaks that make daily navigation smoother. Menus are more logically organised, and devices are easier to group and identify.

The dashboard feels less cluttered, especially for larger networks. You’ll notice quicker access to VLANs, traffic stats, and site-wide performance at a glance. It’s all about saving time and reducing the clicks it takes to get where you’re going.

If you’re a business owner or IT manager trying to keep tabs on a growing number of sites, these small usability changes add up in a big way. At CK Computer Solutions, we can help configure your UniFi dashboard so it displays only what matters most to your team – customising views for your unique network setup.


Improved Device Adoption and Management

Device adoption has traditionally been a sticking point, especially when onboarding remotely. UniFi Controller 9.0 improves on this with smoother device provisioning, especially for remote or pre-provisioned access points and switches.

The Remote Device Management process is far more robust. Devices now show real-time status quicker and update firmware more reliably. This is a game changer for multi-site clients or MSPs managing dozens of locations.

As a Managed IT Service Provider, we at CK Computer Solutions often pre-configure UniFi gear for client deployments. With Controller 9.0, we can now streamline rollouts even more efficiently, ensuring faster setup and zero downtime.


Advanced Threat Management Gets Smarter

Security is a cornerstone of any good IT setup, and UniFi 9.0 pushes the envelope with refined threat detection and DPI (Deep Packet Inspection).

The improved Threat Management Panel gives you clearer visibility into blocked traffic, malicious attempts, and suspicious devices. Alerts are smarter – not just more numerous – so you’re not being drowned in noise. It’s also easier to drill down into exactly what’s going on, from potential DNS tunnelling to known bad IPs.

CK Computer Solutions can help you integrate threat management into your wider security strategy, ensuring your UniFi gear complements firewalls, endpoint security, and other tools already in place.


Client Insights and VLAN Management

Client insights are sharper in 9.0 – not only can you track bandwidth usage per client, but you can see which VLAN they’re connected to and apply policies on the fly.

This is a major win for segmented networks. Whether you’re separating staff, guest, IoT, or voice traffic, UniFi 9.0 makes managing VLANs more straightforward. Changes apply faster, too – and the Controller is more responsive overall.

We help clients across Dublin and Leinster design networks with solid segmentation. CK can step in to audit your existing VLAN strategy, implement best practices, and monitor usage through your UniFi Controller.


Updates Under the Hood

Performance improvements in 9.0 aren’t flashy but they’re definitely noticeable. The Controller starts quicker, handles large networks more gracefully, and syncs configurations faster between devices and the cloud.

Firmware syncing is more stable and predictable. In previous versions, updates occasionally hung or required reboots. That’s far less common now. There’s also better integration with UniFi Protect and Access, making Controller 9.0 a better central hub for all things UniFi.


Should You Upgrade to UniFi Controller 9.0?

In short: Yes, but with a caveat. If your current version is running smoothly and you’re not in a rush, wait until version 9.0.1 or 9.0.2 is released – minor patches tend to iron out any early quirks.

However, if you’re deploying new sites, running into interface limitations, or struggling with inconsistent updates, Controller 9.0 offers enough refinement to justify the move.

For many of our clients, we handle this upgrade as part of our proactive maintenance packages. We’ll schedule the migration during off-hours, back up your site configuration, and test everything to avoid disruption.


How CK Computer Solutions Can Help You Transition

Whether you’re already using UniFi or considering a move away from traditional networking setups, we’re here to help. As a trusted Managed IT Services provider in Dublin, CK Computer Solutions offers:

  • Full UniFi network design and installation
  • Secure remote monitoring and management
  • Threat detection and response integration
  • VLAN setup and segmentation
  • Controller hosting and updates
  • On-call technical support for any UniFi-related issue

Our team works closely with clients to ensure your network is not only stable but also secure and future-proofed.


UniFi Controller 9.0 isn’t revolutionary, but it is a solid, thoughtful update. It refines the platform, tightens up performance, and makes life easier for network admins and MSPs alike.

If you’re managing UniFi gear in a business environment, these changes make day-to-day management more efficient – and ultimately, more secure.

At CK Computer Solutions, we don’t just install your gear and walk away. We’re your long-term IT partner – helping you monitor, manage, and grow your network with confidence. If you’re curious about UniFi or need help upgrading to Controller 9.0, get in touch today.


1. Start with a Baseline Simulation

Before launching any custom campaigns, it’s smart to begin with a baseline simulation. This provides a clear, honest view of your organisation’s current exposure to phishing threats.

It helps you identify which users are most likely to click malicious links, who might give away credentials, and who reports suspicious content as they should. That initial data becomes the benchmark for future training and gives you a solid foundation to build on.

Choose a realistic phishing template that mirrors something your team might see in their inbox, such as a Microsoft sign-in page or a delivery notification. These templates create a believable scenario, helping you measure responses in a real-world context.


2. Target by Department or Role

A blanket approach to phishing simulation rarely hits the mark. Different departments face different types of threats—what tricks an HR manager might fall for won’t necessarily fool someone in finance.

Tailor simulations to specific roles or teams. For instance, the finance department could receive an email mimicking a supplier invoice. Meanwhile, HR might get a phoney job application with a dodgy attachment. These targeted campaigns improve relevance and allow staff to train against the threats they’re most likely to encounter.

Not only does this increase the effectiveness of the simulation, but it also makes your employees feel like the training is actually applicable to their role—something they’ll take more seriously.


3. Monitor Performance and Spot Trends

One of the strongest features in Microsoft 365’s security suite is the depth of its reporting. You can track who clicked, who entered credentials, who reported the simulation, and how quickly they responded.

This data tells a powerful story. Are certain users repeatedly falling for phishing attempts? Are some departments more vigilant than others? These trends can help you deliver more targeted follow-up training and better allocate resources where they’re most needed.

To stay ahead of the curve, enable automated alerts or schedule regular performance summaries. The quicker you can react to a problem area, the more effective your interventions will be.


4. Deliver Instant Training After a Mistake

When someone clicks a simulated phishing email, make sure the training follows immediately. Redirect them to a short training module on the spot. When the lesson comes right after the mistake, it tends to stick better.

This isn’t about shaming anyone—it’s about creating a learning opportunity at the most teachable moment. People are much more open to understanding what went wrong when it’s fresh in their minds.

Keep the training sharp and scenario-based. Short, snappy content works better than long, passive slideshows or videos. The goal is to inform, not to bore or overwhelm.


5. Make It a Continuous Process

Cybersecurity training can’t be treated as a one-off event. The threat landscape changes constantly, and attackers are always coming up with new tactics. Your training needs to evolve with them.

Schedule phishing simulations regularly—monthly or quarterly. And always mix it up. Use different email types, target various departments, and rotate through tactics like link-based attacks, file attachments, and credential harvesting.

Routine training keeps awareness high and reduces the chance that your staff will get complacent. The more exposure they have to a variety of threats, the more confident and prepared they’ll be.


6. Reinforce Your Internal Security Policies

Simulated phishing should mirror your real-life security protocols. There’s no point training someone to recognise a suspicious email if you haven’t also shown them the correct steps to take once they do.

Tie the simulations directly into your organisation’s policies. For example, if your policy says not to forward suspect emails, build that into the training. If you have a reporting channel, make sure staff know exactly how to use it during the exercise.

This is a great opportunity to reinforce internal processes—whether that’s escalation procedures, who to contact after clicking something dodgy, or how to report a breach. The simulation becomes both training and policy reminder in one.


How CK Computer Solutions Can Help

At CK Computer Solutions – Managed IT Services Dublin, we don’t just hand you the tools—we help you use them to full effect. As your trusted Managed Service Provider, we can help integrate and manage Microsoft Defender for Office 365 across your organisation.

Our team can:

  • Roll out tailored phishing simulations that suit your team’s structure.

  • Monitor reports and help interpret the results.

  • Provide on-the-spot training content to match your internal policies.

  • Offer ongoing support and improvements to your security training programme.

With CK Computer Solutions in your corner, you’ll turn your staff into a knowledgeable, responsive defence layer—and that’s priceless in today’s threat environment. Let’s work together to make sure your people are ready for anything.


Contact Us